Myopia Eye and Concave Lens Vector Illustration Showing Nearsighted Vision Correction
Myopia, commonly known as nearsightedness, is a refractive vision condition in which distant objects appear blurred while close objects can be seen clearly. This occurs when the eyeball is elongated or the cornea has excessive curvature, causing light rays to converge in front of the retina instead of directly on it. A vector illustration of a myopic eye typically combines anatomical representation of the eye structure, the path of light rays, and the corrective use of a concave lens, providing a clear visual explanation of both the visual defect and its optical correction. By integrating eye anatomy, light refraction principles, and corrective lens function, the diagram allows learners to understand the causes, effects, and solutions for nearsightedness.
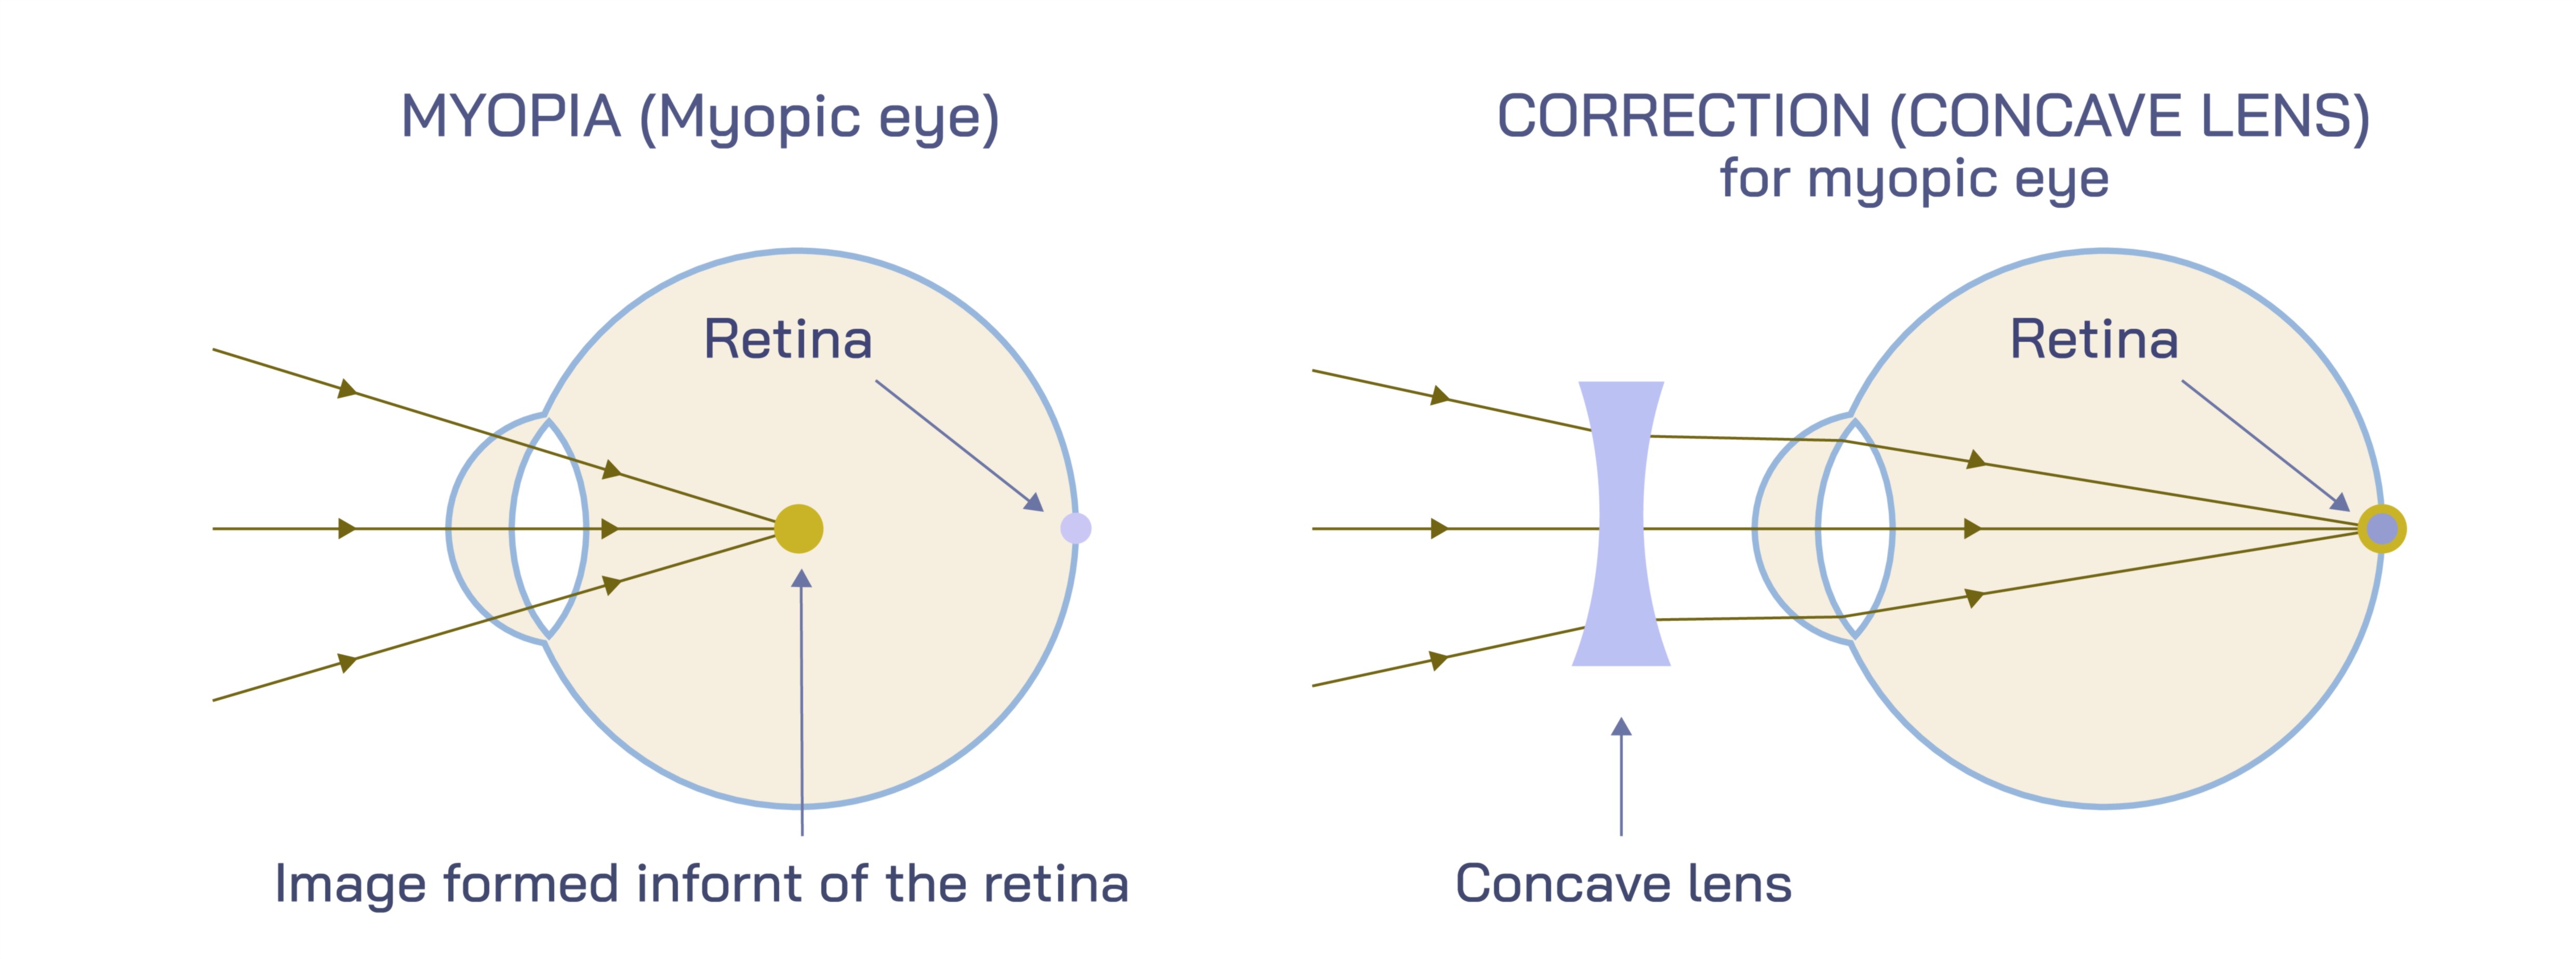
At the core of the illustration is the myopic eyeball, shown in a longitudinal cross-section. The vector diagram depicts the cornea, lens, retina, vitreous body, and optic nerve, providing spatial context for the path of incoming light rays. In a myopic eye, parallel rays from distant objects converge before reaching the retina, creating a blurred image. Arrows along the light path demonstrate this premature convergence, with color coding or line thickness often emphasizing the misalignment between focal point and retinal surface. The diagram may also illustrate the relative elongation of the eyeball compared to a normal eye, highlighting the anatomical factor contributing to nearsighted vision.
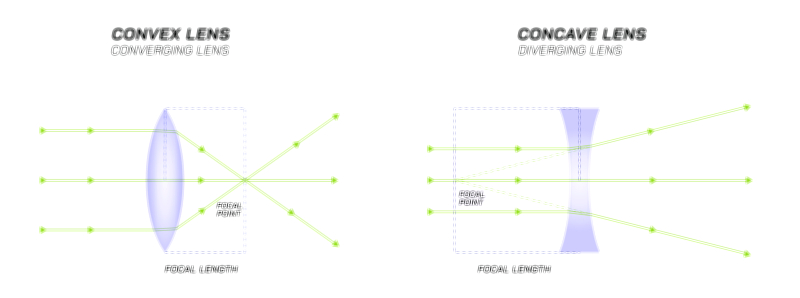
A central feature of the vector illustration is the depiction of a concave lens, which is used to correct myopia. The concave lens is shown in front of the eye, with arrows illustrating how it diverges incoming light rays before they enter the cornea and lens. This divergence allows light to be focused properly on the retina, producing a sharp image. The diagram typically includes labels such as focal point, lens axis, and direction of light rays, clarifying how the lens compensates for the excessive convergence caused by the myopic eye. Color-coded light paths, with one representing uncorrected vision and another representing corrected vision through the concave lens, make the correction mechanism visually intuitive.
Vector illustrations often highlight the difference between distant and near vision in myopic individuals. While distant objects appear blurred due to the anterior focal point, near objects naturally focus on the retina, enabling clear vision. The diagram may show two separate sets of rays—one for a far object and one for a near object—demonstrating why myopia primarily affects distance vision. Arrows or annotations may indicate the distance at which the image starts to blur (far point), providing a visual cue for understanding the severity of nearsightedness.
Additional features often included in the vector illustration are eye anatomy details relevant to refraction, such as the curvature of the cornea, lens flexibility, and the length of the eyeball. Labels can specify the anterior chamber, vitreous body, and optic nerve, providing context for how light travels through the eye’s internal structures. Cross-sectional shading or 3D perspective may be used to enhance the spatial understanding of light propagation and lens placement.
Vector diagrams also often include comparison with a normal eye, showing how light rays converge precisely on the retina without corrective lenses. This comparison helps viewers visually contrast the myopic eye with the emmetropic (normal) eye, emphasizing the role of the concave lens in correcting the focal point. Arrows, lines, and focal point labels in both illustrations make the differences clear, reinforcing the concept of optical correction in a straightforward, intuitive manner.
Educational vector illustrations may also depict eyeglasses or contact lenses as real-world applications of concave lenses. Frames or lens outlines can be shown in front of the eye, with arrows demonstrating light divergence before entry. This connects the optical principle with practical vision correction tools, enhancing relevance for learners. In some illustrations, the vector diagram may also include laser correction for myopia, showing how refractive surgery reshapes the cornea to adjust focal distance, providing additional context for treatment options.
By integrating anatomical details, light ray paths, focal points, and corrective lens function, a vector illustration of a myopic eye provides a clear, holistic understanding of nearsightedness and its correction. The diagram communicates both the cause of blurred distance vision and the mechanism by which concave lenses restore clarity. Color coding, labeled arrows, and side-by-side comparisons with a normal eye enhance comprehension and make complex optical concepts visually accessible.
Ultimately, a vector illustration of myopia and concave lens correction demonstrates the relationship between eye structure, light refraction, and vision quality. It visually explains why distant objects appear blurred, how near vision remains clear, and how concave lenses adjust light pathways to focus on the retina. Through detailed anatomical representation, light paths, and corrective lens depiction, the diagram provides an educational and visually intuitive tool for understanding myopia, its impact on vision, and effective optical solutions.