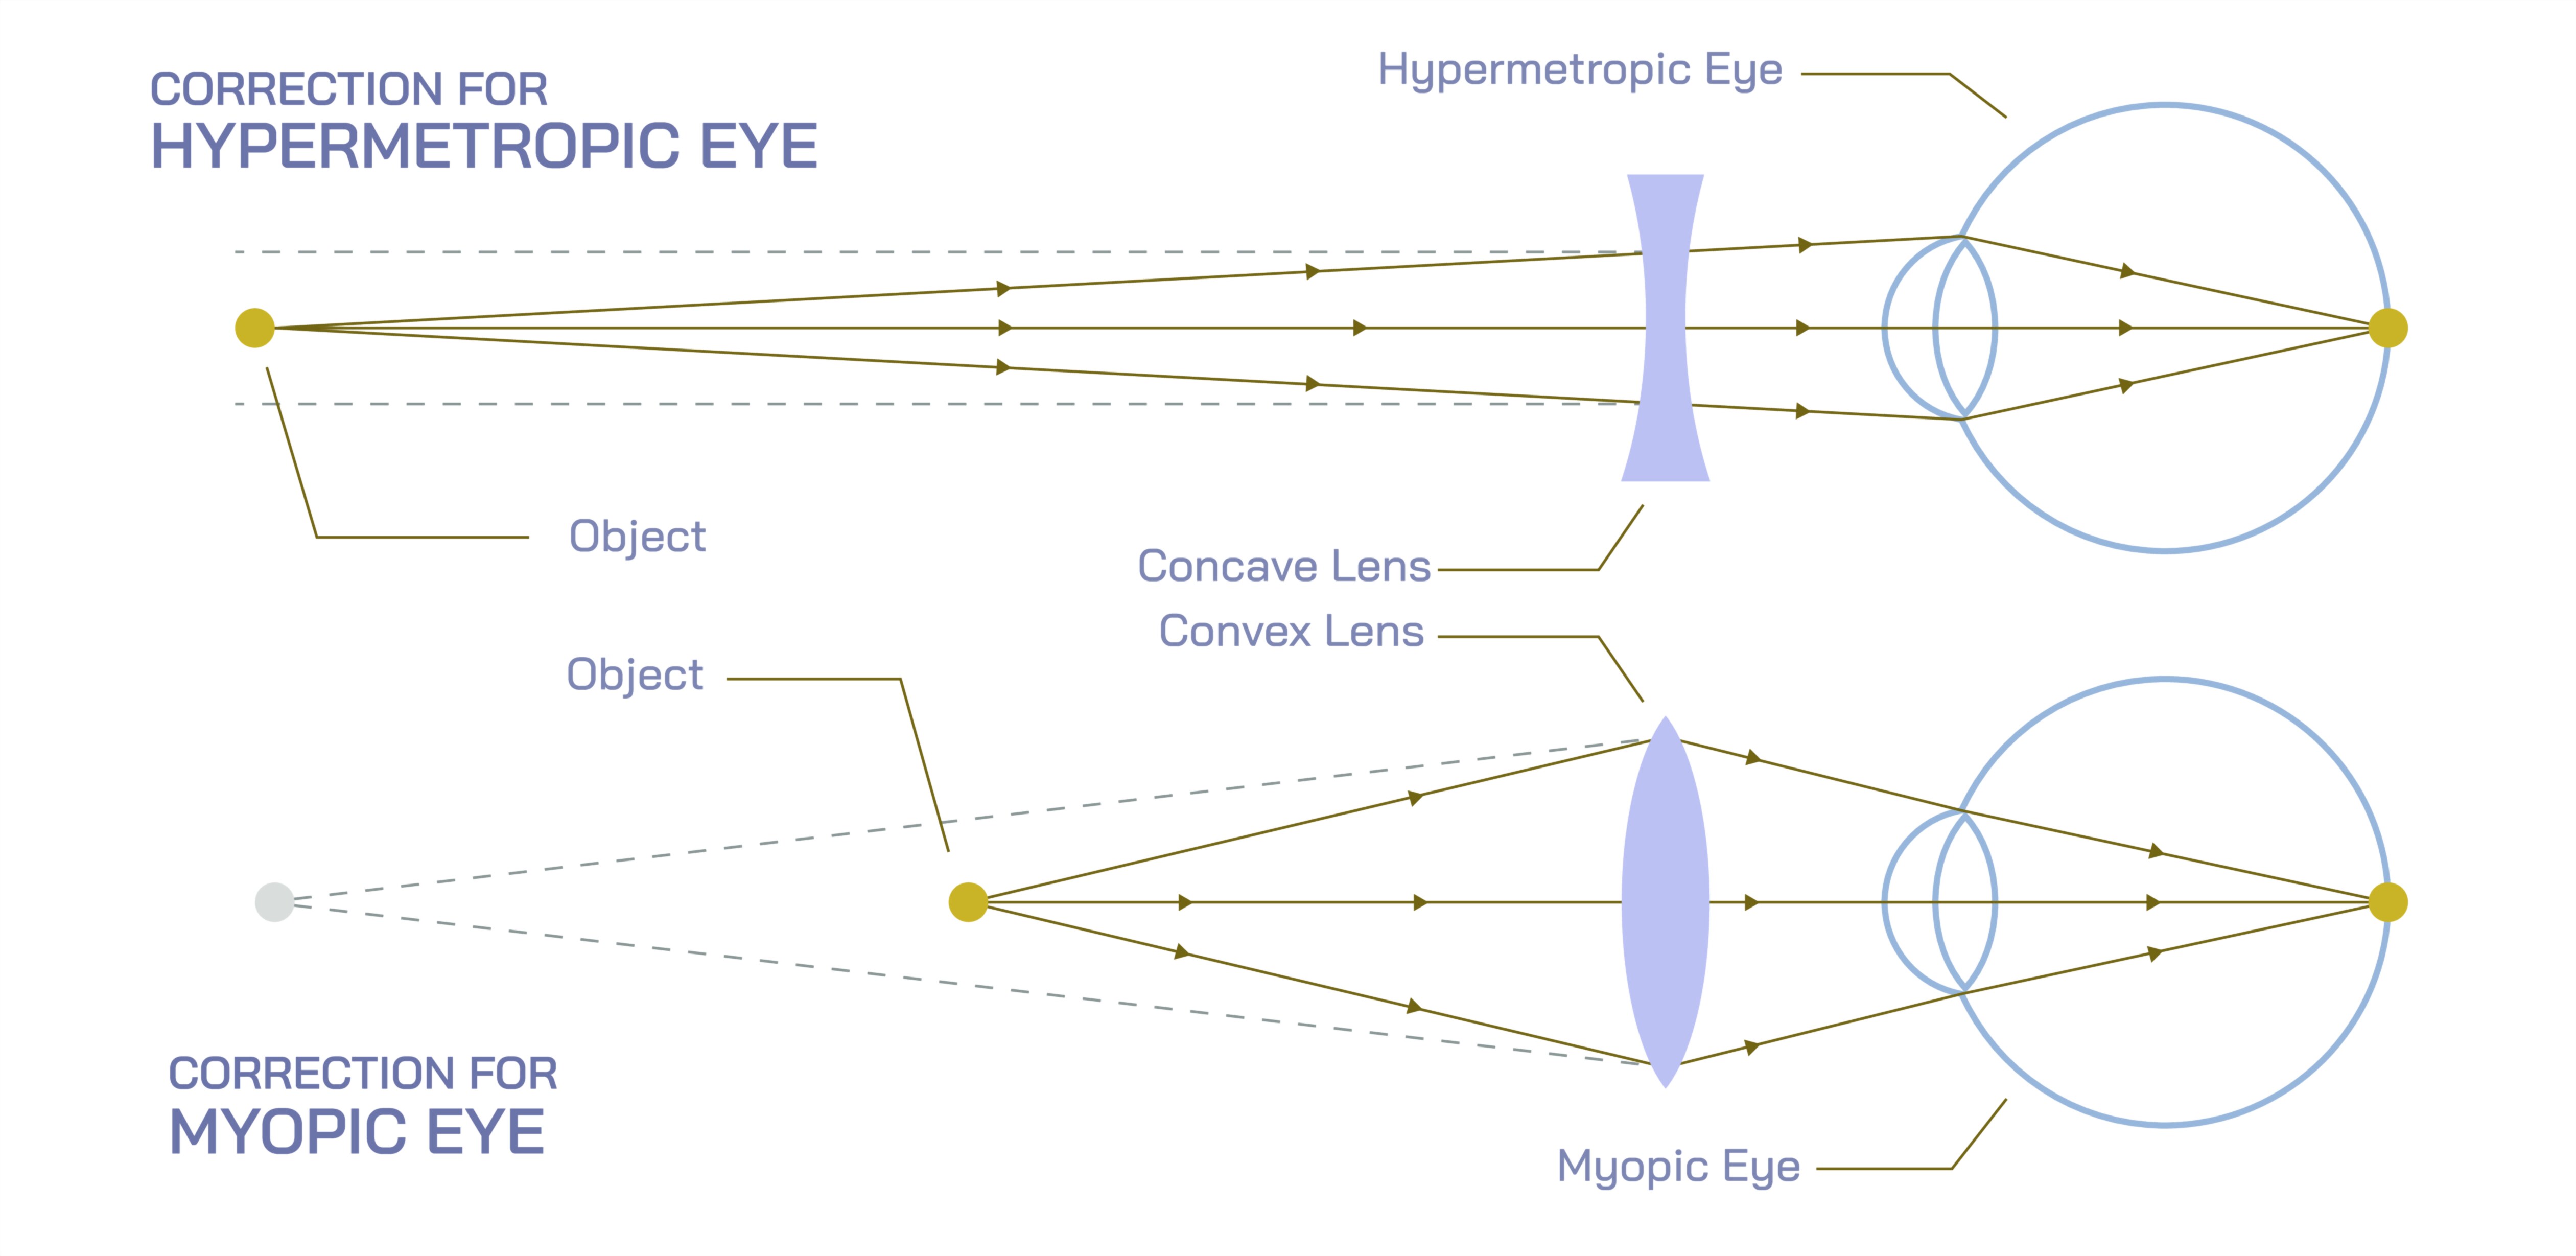
Hypermetropic and Myopia Vector Illustration Showing Eye Defects, Focal Point Differences, and Corrective Lens Solutions
Vision defects such as hypermetropia (farsightedness) and myopia (nearsightedness) occur due to irregularities in the shape of the eye or lens, which prevent light from focusing correctly on the retina. Hypermetropia results in difficulty seeing nearby objects clearly, while myopia causes blurred vision for distant objects. A vector illustration depicting these common refractive errors typically integrates eye anatomy, light path diagrams, focal point locations, and corrective lens solutions, providing a visually intuitive explanation of both defects and their corrections. By combining labeled eye structures, directional light rays, and lens overlays, such diagrams allow learners to clearly understand the causes, consequences, and solutions for these vision problems.
At the center of the illustration are two schematic human eyes, shown in side view for clarity. Each eye is labeled with cornea, lens, retina, optic nerve, and vitreous body, emphasizing the structural components critical for focusing light. Color coding distinguishes the cornea and lens, making the optical path easy to follow. Arrows indicate the direction of incoming light, helping viewers visualize how rays converge within or outside the eye in different conditions.
Hypermetropic eye (farsightedness) is illustrated with a shorter-than-normal eyeball or a lens with insufficient curvature. Light rays entering the eye converge behind the retina rather than on it, resulting in blurred near vision. Vector arrows represent light paths, showing divergence before the retina. Labels indicate the focal point location, and callouts may highlight symptoms such as difficulty reading, eye strain, and headaches. The illustration often includes a convex corrective lens in front of the eye, with arrows showing how the lens converges light rays onto the retina, restoring normal focus.
Myopic eye (nearsightedness) is illustrated with a longer-than-normal eyeball or excessively curved lens. Light rays entering the eye converge in front of the retina, making distant objects appear blurry. Vector arrows depict light convergence prior to reaching the retina, and labels indicate the incorrect focal point. Callouts may highlight symptoms such as difficulty seeing distant road signs or classroom boards. The illustration includes a concave corrective lens placed before the eye, showing how diverging rays redirect light to properly converge on the retina, restoring clarity for far vision.
Vector diagrams often include side-by-side comparisons of normal, hypermetropic, and myopic eyes. Light rays are color-coded (e.g., red for incorrect convergence, green for corrected focus) to emphasize differences in focal points and the effectiveness of corrective lenses. Arrows highlight the shift of focal points due to lens intervention, visually demonstrating the principle of refraction correction.
Magnified insets may show lens curvature and eyeball length differences, connecting anatomical irregularities to optical effects. Labels indicate key metrics such as axial length, lens power, and curvature radius. Arrows may illustrate how these differences impact light refraction, linking structural abnormalities to functional vision deficits.
Additional educational features include symptom annotations and practical examples. For hypermetropia, near tasks like reading or threading a needle may be illustrated, whereas myopia examples may show distant activities such as driving or watching presentations. Corrective lens diagrams may include curvature illustrations (convex vs concave) and focal shift arrows, reinforcing the principle behind eyeglass or contact lens prescriptions.
The vector illustration may also include optical ray diagrams, demonstrating multiple light rays entering the eye and the paths they take toward the retina. Shaded areas may represent blurred zones or defocused points, while corrected rays are overlaid with arrows showing proper convergence. This helps learners connect theoretical optics with practical visual outcomes.
By combining eye anatomy, light path arrows, focal point labeling, hypermetropic and myopic depictions, and corrective lens overlays, a vector illustration provides a comprehensive understanding of common vision defects. Color coding, directional arrows, labeled components, and side-by-side comparisons make the differences between normal, farsighted, and nearsighted eyes immediately clear, bridging anatomy, optics, and clinical correction.
Ultimately, a hypermetropic and myopic eye vector illustration demonstrates the causal relationship between eye shape, focal point location, and visual clarity, while showing how corrective lenses restore normal vision. Through labeled eye structures, directional light rays, focal point indicators, and lens corrections, the diagram transforms abstract optical concepts into an educational, visually engaging, and intuitive tool for medical study, optometry, physics, and vision science education.